You might think you’re winning the war against soap scum and mildew, but your aggressive scrubbing and go-to cleaner could be your bathroom’s worst enemy. The frustration of a perpetually dingy shower or a filmy tub often leads us to double down on elbow grease and harsh chemicals—precisely the shower tile cleaning mistakes that cause permanent etching, dull surfaces, and microscopic scratches that trap more dirt. This counterintuitive truth means your cleaning routine might actually be making things worse, locking you into a cycle of more frequent and less effective work. But it doesn’t have to be that way. By identifying and stopping a handful of common tub cleaning mistakes and surface errors, you can shift from causing damage to achieving a lasting, pristine clean with less effort. This guide cuts through the clutter with a quick-action checklist of the blunders to avoid immediately, followed by the smarter techniques and product matches that actually work.
The biggest shower and tile cleaning mistakes often cause more harm than good, damaging surfaces and trapping dirt. To clean effectively, avoid abrasive scrubbing, mismatched cleaners, and neglecting proper drying. The most critical errors involve using the wrong tools (like steel wool on acrylic), harsh chemicals (such as acid on natural stone), and incorrect techniques (like scrubbing grout aggressively or letting cleaner dry on surfaces), which lead to etching, scratches, and faster mildew regrowth.
Your Quick-Action Checklist: Stop These 7 Mistakes Today
Before we dive into the details, here’s your immediate action plan. Stop doing these seven things right now to prevent damage and make your cleaning more effective.
- Using abrasive scrubbers on acrylic or glazed surfaces: This creates microscopic scratches that trap soap scum and mildew, making your surfaces look perpetually dirty.
- Applying acidic cleaners to natural stone: Vinegar, lemon juice, or tub and tile cleaners with acid will etch and dull marble, limestone, and travertine permanently.
- Letting cleaner sit too long (or dry completely): This can damage seals and grout, leave a filmy residue, and reduce the product’s cleaning power.
- Using the same rag or sponge for everything: You’re just spreading germs and grime from one surface to another, a major bathroom tile cleaning error.
- Ignoring ventilation and drying after cleaning: A warm, wet bathroom is a paradise for mildew, undoing all your hard work within hours.
- Scrubbing grout aggressively with a stiff brush: This erodes the grout itself, creating deeper grooves for mold to take root.
- Mixing cleaning chemicals, especially bleach and ammonia: This can create dangerous toxic gases and is a severe cleaning product misuse.
Mistake 1: The Wrong Scrub for the Job
One of the most frequent tub cleaning mistakes is attacking soap scum with the most aggressive tool in the cabinet. That green scrub pad or wad of steel wool might seem like a good idea on a tough stain, but on many bathroom surfaces, it’s a one-way ticket to permanent damage.
Acrylic tubs, fiberglass surrounds, and the glossy glaze on ceramic or porcelain tile are relatively soft. Abrasive pads scratch them at a microscopic level. These tiny grooves don’t just look bad under light—they become perfect little footholds for soap residue, hard water minerals, and mildew spores. The result? A surface that gets dirtier faster and becomes increasingly difficult to clean, trapping you in a cycle of ineffective shower cleaning.
Do This, Not That
Don’t: Use steel wool, harsh green or blue scrub pads, or powdered cleansers with abrasives on acrylic, fiberglass, or glossy tile.
Do: Start with the gentlest option. Use soft microfiber cloths, a dedicated bathroom sponge, or a soft nylon brush. For stubborn spots, a melamine sponge (like a Magic Eraser) can be effective, but use it with light pressure and plenty of water, as it works via micro-abrasion and can dull surfaces if used too forcefully.
Mistake 2: Chemical Mismatch (The Cleaner That Eats Your Surfaces)
All cleaners are not created equal, and using the wrong one is a surefire way to cause bathroom surface damage. This mistake often stems from a well-intentioned but flawed belief that “stronger” equals “better.”
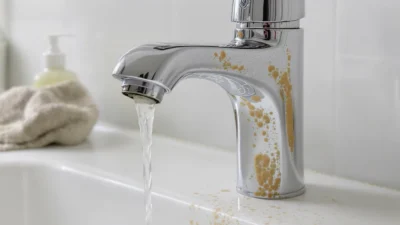
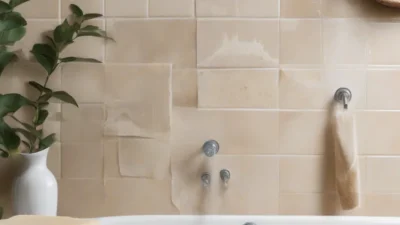
The most critical rule: never use acidic cleaners on natural stone. This includes common DIY solutions like vinegar or lemon juice, as well as commercial products like lime scale removers (CLR) or some toilet bowl cleaners. Acids react with the calcium carbonate in marble, limestone, travertine, and some slate, causing chemical etching. This appears as dull, whitish spots or rings that cannot be polished out without professional help.
Troubleshooting Your Damage
If you see dull, cloudy patches where the shine is gone, you likely used an acidic product. For colored or sealed grout, bleach can be another culprit, causing fading or discoloration. The fix is always harder than the prevention. Always read the product label to ensure it’s safe for your specific surface. When in doubt, test any new cleaner in an inconspicuous area, like a back corner of the tub or behind the toilet.

Photo by Kate Branch on Pexels
For daily cleaning of stone, use a pH-neutral, stone-specific cleaner. For general bathroom surfaces, an all-purpose bathroom cleaner or a paste of baking soda and water is a safer starting point than a harsh acid.
Mistake 3: The ‘Set It and Forget It’ Cleaner Application
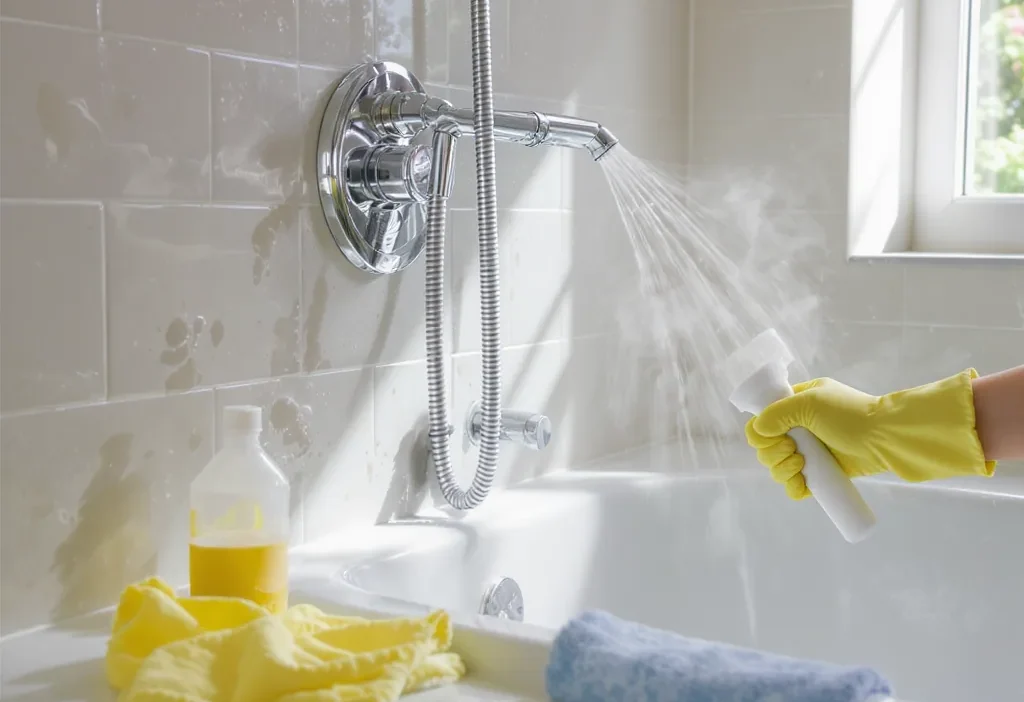
We’ve all done it: spray down the entire shower wall, then go answer a text or start another chore, thinking the cleaner is “working.” This “set it and forget it” approach is one of the most common bathroom tile cleaning errors. Most cleaners have a specific “dwell time”—usually 30 seconds to a few minutes—where they need to stay wet to break down grime.
Letting them dry completely changes the chemistry. It can leave a sticky, difficult-to-rinse residue that actually attracts more dirt. On sensitive surfaces like certain sealants or older grout, a concentrated, dried chemical can break down the material. The key is to work in manageable sections. Spray one area, let it sit for the recommended time (keeping it moist if needed with a light mist), then scrub and rinse thoroughly before moving on. This ensures the product works as intended and is completely removed.
Mistake 4 & 5: Cross-Contamination and Ignoring Moisture
These two errors are different sides of the same coin: habits that undermine a truly clean and healthy bathroom.
Cross-Contamination: Using the same sponge or rag to wipe the toilet, then the sink, then the shower wall is a classic blunder. You’re not cleaning; you’re redistributing germs and grime. This turns a simple cleaning session into an exercise in spreading bacteria.
Ignoring Moisture: After you’ve rinsed everything sparkling clean, the job isn’t done. Walking out and closing the shower door or curtain creates a dark, warm, humid incubator. Mildew spores are everywhere, and they can begin to colonize a damp surface in as little as 24 hours.
Do This, Not That
Don’t: Use a single rag for the whole bathroom. Don’t leave the bathroom sealed up and wet after cleaning.
Do: Use a simple color-coded system with microfiber cloths (e.g., blue for glass/mirrors, green for counters/sinks, red for toilet). Wring out sponges thoroughly after use and allow them to dry completely. After cleaning, ventilate aggressively. Run the bathroom fan for at least 30 minutes, open a window, or use a portable fan to circulate air and dry surfaces completely. This single step drastically slows mildew regrowth.
How to Correct Common Cleaning Damage
If you’re reading this and realizing you’ve already made some of these tub cleaning mistakes, don’t panic. While some damage is permanent, there are often corrective steps you can take.
For Dulled or Lightly Scratched Acrylic/Fiberglass:
You can often restore shine with a dedicated plastic polish or a very fine automotive polishing compound designed for clear plastics. Apply with a soft cloth using gentle, circular motions, then buff clean. This fills in micro-scratches.
For Etched Natural Stone:
Minor etching may be improved by a professional stone restorer using a process called honing and polishing. For a DIY attempt on a small area, a paste of baking soda and water left as a poultice on the stain overnight can sometimes draw out slight discoloration, but it will not restore a polished shine.
For Discolored or Mildewed Grout:
First, kill the mildew with a dedicated grout cleaner or a hydrogen peroxide solution. For stained grout, a grout pen or epoxy-based grout paint can provide a fresh, sealed surface. The most durable fix is to remove and replace damaged grout sections, then apply a high-quality penetrating sealer.
For Persistent Soap Scum on Scratched Surfaces:
Once a surface is scratched, soap scum bonds more tightly. A stronger, non-abrasive cleaner like a commercial soap scum remover (test first!) and a soft nylon brush may be needed. Going forward, consistent drying and more frequent, gentle cleaning are key to managing the problem.
Clean Smarter, Not Harder
The goal of cleaning your bathroom shouldn’t be a weekly battle. By shifting your mindset from aggressive scrubbing to informed maintenance, you protect your investment and save yourself countless hours of frustration. Avoiding these common shower cleaning blunders and tub cleaning mistakes is fundamentally about respecting the materials in your home.
Remember, the cheapest and easiest repair is the one you never have to make. Equip yourself with the right tools, match your chemicals to your surfaces, and never underestimate the power of a dry, well-ventilated space. Your bathroom will not only look cleaner but will stay cleaner for longer, turning a dreaded chore into a quick, effective routine.
The core philosophy for avoiding shower, tub, and tile cleaning mistakes is simple: match your method to your materials. Abrasive tools and harsh chemicals often cause the very problems you’re trying to solve, leading to scratched surfaces, etched stone, and damaged grout that trap more dirt. Effective cleaning relies on using gentle tools first, choosing surface-safe cleaners, working in sections to prevent residue, and eliminating moisture to stop mildew before it starts. By focusing on smart, preventive care rather than aggressive correction, you achieve a lasting clean without the damage.