You’ve spent the morning cleaning, yet somehow the kitchen counters are streaky, the bathroom mirror is smeared, and the living room floor seems to have attracted a fresh layer of dust. This cycle of effort without lasting results is a common frustration, and it usually points to a simple truth: the problem isn’t a lack of elbow grease, but a series of subtle, routine cleaning missteps. This guide isn’t another list of what to clean; it’s a corrective protocol playbook focused on cleaning mistakes to avoid. We’ll shift the focus from random acts of tidying to a systematic method that protects your surfaces, saves your time, and actually works. By understanding the common cleaning mistakes related to tools, techniques, and sequence, you can transform your approach from a chore that backfires into a process that delivers genuine, lasting cleanliness.
The most critical cleaning mistakes to avoid stem from using the wrong tools for the surface, applying products incorrectly, and cleaning in the wrong order. This wastes time, leaves residue, and can cause damage. The core answer is that effective cleaning is about method and protocol, not just effort. By focusing on correct technique and the right sequence, you can clean more efficiently and protect your home.
Why Your Cleaning Routine Isn’t Working: The Mindset Shift
If you feel like you’re constantly cleaning but never truly getting ahead of the mess, the problem likely isn’t your effort—it’s your approach. Many home cleaning errors stem from viewing cleaning as a series of isolated tasks rather than a systematic process. This mindset leads to random acts of wiping and spraying that waste time, leave behind product residue, and can even cause long-term surface damage.
The core philosophy of effective cleaning is protocol over panic. It’s about understanding the sequence, the chemistry, and the mechanics of how dirt is removed. For instance, using a harsh chemical where a gentle one is needed, or cleaning floors before dusting shelves, creates more work for you. By shifting to a methodical mindset, you move from correcting messes to preventing them, which is the ultimate goal of avoiding common cleaning mistakes. This approach not only saves time but also aligns with safer household practices, as recommended by resources like the EPA’s guidelines on safer chemical use.
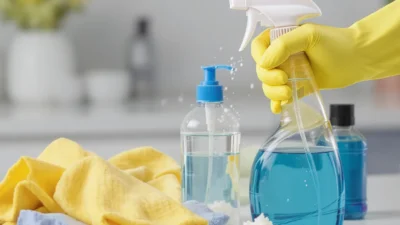
The Tool & Product Pitfalls: Using the Wrong Stuff
One of the most frequent categories of home cleaning errors involves using inappropriate tools or cleaners for the job. It’s a classic case of the right intention but the wrong execution, leading to streaks, scratches, and a frustrating lack of results.
The Quick-Reference Guide: Tool Truths
- Do use color-coded microfiber cloths for different areas (e.g., blue for glass, green for kitchens) to prevent cross-contamination.
- Don’t use paper towels on glass or stainless steel; they leave lint and don’t capture dirt effectively, creating streaks.
- Do invest in a dedicated glass cleaner for mirrors and windows. All-purpose cleaners often contain surfactants that leave a filmy residue.
- Don’t use abrasive scrubbers (like steel wool) on any non-stick, enamel, or polished surface. They create micro-scratches that harbor grime.
- Do read cleaner labels carefully to ensure they are safe for the surface you’re targeting (e.g., “safe for granite” or “for sealed wood”).
- Never, ever mix cleaning chemicals, especially bleach with ammonia or vinegar. This can produce toxic gases and is a severe safety hazard.
These damaging cleaning practices often seem like shortcuts but inevitably backfire. Using a rough sponge on an acrylic bathtub will cloud its finish, and wiping a granite counter with a vinegar-based solution can slowly etch the stone. The right tool doesn’t just clean better; it protects your investment.
The Technique Traps: How You Clean Matters Most
Even with the perfect products, your technique can make or break the outcome. Many routine cleaning missteps happen here, turning a simple task into a source of frustration.
Problem: Streaky Windows and Mirrors
Likely Mistake: Spraying cleaner directly onto the glass, which leads to over-saturation and drips. Using a dirty or low-quality cloth to wipe.
Correct Technique: Spray your cleaner lightly onto a microfiber cloth first, then wipe the glass in an “S” pattern. Buff dry immediately with a second clean, dry microfiber cloth. This prevents drips and forces you to use a clean surface on the cloth.
Problem: Lingering Grime or Stains on Surfaces
Likely Mistake: Not allowing dwell time. For disinfectants and degreasers to work, they need to sit on the surface for a period (usually 30 seconds to several minutes, as stated on the label). Scrubbing immediately rinses the active ingredients away before they can break down dirt.
Correct Technique: Apply the product, let it sit for the recommended contact time, then wipe or scrub. This is especially critical for sanitizing kitchen and bathroom surfaces.
Problem: A Vacuum That Seems Ineffective
Likely Mistake: Using only the vacuum’s forward motion. Pushing dirt forward often just redistributes it.
Correct Technique: Use slow, overlapping strokes, and pull the vacuum back toward you on the same path. This double pass ensures the agitator or suction has two chances to lift debris from the fibers.
The Room-by-Room Error Audit
Some avoidable cleaning blunders are specific to certain areas of your home. Use this mini-checklist to spot and correct these frequent pitfalls.
Kitchen
- [ ] Avoid using all-purpose degreasers or vinegar on natural stone countertops (granite, marble), as they can dull or etch the sealant.
- [ ] Do clean stainless steel appliances with the grain, not in circles, to prevent visible swirl marks.
- [ ] Avoid using a soaking wet sponge on wooden cutting boards or butcher block; wipe with a damp cloth and dry immediately to prevent warping.
Bathroom
- [ ] Avoid using abrasive cleansers (powders, harsh scrubbing bubbles) on chrome, brass, or gold-plated fixtures, which will scratch the finish.
- [ ] Do turn on the exhaust fan or open a window during and after cleaning to reduce humidity and prevent mold/mildew growth.
- [ ] Avoid neglecting the showerhead. Mineral buildup inside can reduce water pressure; descale it monthly by soaking in a bag of vinegar.
Living Areas & Floors
- [ ] Avoid vacuuming in only one direction. As noted in the technique section, use overlapping back-and-forth strokes.
- [ ] Do check your mop’s water temperature. For modern vinyl or laminate, very hot water can damage the adhesive or finish.
- [ ] Avoid over-wetting hardwood floors. Use a damp mop, not a wet one, and dry the floor with a towel immediately after mopping to prevent water from seeping into seams.
When in doubt, always refer to the manufacturer’s care guidelines for specific surfaces like flooring or appliances—this is the single best way to prevent home cleaning errors.
Your 10-Step Mistake-Proof Whole-Home Cleaning Protocol
This protocol integrates all the lessons above into a single, efficient sequence. It’s designed to prevent re-contamination, maximize efficiency, and ensure nothing is missed.
- Gather & Prep: Collect all tools, cleaners, and fresh microfiber cloths. Put on gloves and open windows for ventilation. This prevents mid-clean searches and ensures safety.
- Declutter First: In each room, remove items that don’t belong (dishes, toys, clutter). You can’t clean a surface that’s covered.
- Dust High-to-Low: Start with ceiling fans, light fixtures, and tops of cabinets, then work down to shelves, electronics, and furniture. This allows falling dust to be captured later.
- Clean Glass & Mirrors: Tackle these now, while your cloths are clean and the room is dust-free, using the proper spray-on-cloth technique.
- Address Upholstery & Mid-Level: Vacuum couch cushions, chairs, and drapes. Wipe down all tables, countertops, and appliance exteriors with appropriate cleaners.
- Tackle the Kitchen: Clean inside the microwave, wipe down appliance interiors (if needed), scrub the sink, and finish with countertops and the stovetop.
- Conquer the Bathroom: Spray disinfectant in the toilet bowl and on other surfaces first to allow dwell time. Then scrub the shower/tub, wipe down counters and fixtures, and finally clean the toilet exterior and bowl.
- Vacuum All Floors: Starting from the farthest corner of the house, vacuum all carpets and rugs using slow, overlapping strokes. Change attachments for edges and corners.
- Mop Hard Surfaces: Using a clean mop and the correct floor cleaner, mop all hard-surface floors. Work backward toward an exit so you don’t walk on wet floors.
- Final Touches & Tool Cleanup: Empty all trash bins, replace liners, and fluff pillows. Then, clean your tools—rinse mop heads, wash microfiber cloths, and empty the vacuum canister.

Think about the last time you “cleaned the bathroom.” You probably sprayed and wiped the counter, scrubbed the tub, and then noticed dust and hair on the floor, which you then tracked back onto the freshly cleaned surfaces. This protocol eliminates that two-steps-forward, one-step-back feeling by following a logical, contaminant-conscious order.
Correcting Past Mistakes: Damage Control & Reset
If you’ve already fallen victim to some of these ineffective cleaning techniques, don’t worry—most damage is reversible. Here’s how to troubleshoot and reset common issues.
Problem: Waxy Buildup on Floors or Surfaces
Cause: Overusing spray waxes or “shine-enhancing” cleaners that layer on over time, creating a dull, sticky film.
Fix: Strip the buildup. For sealed hard floors, use a solution of a cup of clear ammonia in a gallon of warm water (in a well-ventilated area). Mop lightly, rinse thoroughly with clean water, and dry. Always test in an inconspicuous area first.
Problem: Scratched or Dull Surfaces (Acrylic, Glass Cooktops, Stainless Steel)
Cause: Using abrasive pads or harsh powders.
Fix: For light scratches, a specialized polishing compound for that specific material (like a cooktop polishing cream) can often minimize their appearance. For prevention, switch to soft sponges and non-abrasive creams.
Problem: Persistent Streaks on Glass and Stainless Steel
Cause: Residual cleaner or using the wrong cloth.
Fix: Wipe down with a 50/50 solution of distilled water and isopropyl alcohol (rubbing alcohol) using a clean microfiber cloth. The alcohol helps dissolve residue and evaporates quickly without streaks.
Problem: Lingering Musty Odors
Cause: Moisture trapped in fabrics or surfaces, often from not allowing adequate drying time after cleaning.
Fix: Identify the source. Run a dehumidifier, sprinkle baking soda on carpets before vacuuming, and ensure towels and cloths are completely dry before storing. For washing machines, run a clean cycle with a washing machine cleaner or vinegar.
Building Better Habits: The Maintenance Mindset
The ultimate goal of learning these common cleaning mistakes isn’t just to execute a perfect deep clean once, but to build a sustainable maintenance routine that prevents messes from accumulating in the first place. This is the shift from correction to prevention.
Incorporate micro-tasks into your daily and weekly routine that align with the correct protocol. For example, wipe down the shower wall with a squeegee after each use (preventing hard water stains), clean kitchen counters with an appropriate spray each night, and do a quick 10-minute “high-to-low” dusting of the living room once a week. This consistent, light touch means you’ll rarely need to deploy the full 10-step protocol, saving you hours of weekend time.
Effective cleaning is a habit, not an event. By applying the right techniques consistently in small doses, you make your space easier to manage and protect it from the wear and tear of those damaging cleaning practices we’ve worked to avoid.
Cleaning Smarter, Not Harder
Everyone makes cleaning errors—it’s a natural part of maintaining a home. The key takeaway isn’t to achieve perfection, but to arm yourself with knowledge. By understanding why certain methods fail and adopting a systematic, protocol-based approach, you transform cleaning from a chore into a skilled practice.
You now have the blueprint to avoid the pitfalls that waste time and risk damage. Remember, the goal is a home that feels consistently clean and cared for, not just in the frantic hour before guests arrive. With these strategies, you can achieve that with less effort and more confidence, leaving you more time to enjoy the space you’ve worked so well to maintain.
This guide reframes cleaning as a methodical process to sidestep common inefficiencies and damage. The core principles are:
- Use the Right Tools: Match cleaners and cloths to the surface. Avoid cross-contamination and chemical mixing.
- Master the Technique: Allow dwell time for products, clean in the correct sequence (high-to-low, dry-to-wet), and use proper motions for vacuuming and wiping.
- Audit Room-Specific Errors: Be mindful of surface-specific don’ts, like using abrasives on fixtures or wrong cleaners on stone.
- Follow the 10-Step Protocol: A systematic whole-home sequence prevents re-contamination and ensures thoroughness.
- Build Maintenance Habits: Integrate correct micro-tasks into daily routines to prevent buildup and make deep cleans less frequent.
By focusing on these pillars, you move beyond random effort to effective, mistake-proof home care.
Q: Can mixing vinegar and baking soda create a super cleaner?
A: Not really. While the fizzing reaction is satisfying and can help dislodge minor clogs, it essentially neutralizes both ingredients into water and salt, leaving little cleaning power on surfaces. For cleaning, it’s more effective to use vinegar or baking soda separately with water.
Q: Is it okay to use the same microfiber cloth in multiple rooms?
A: It’s a common cleaning mistake that spreads germs and dirt. Ideally, use color-coded cloths for different zones (e.g., kitchen, bathroom, general dusting) and wash them after each use. This prevents transferring kitchen grease to your bathroom mirror or spreading bacteria.
Q: Why does my floor look dirtier after I mop?
A: This usually indicates you’re using a dirty mop head or water bucket. You’re essentially redistribting grime instead of removing it. Always start with a clean mop and change the rinse water frequently. For very dirty floors, a two-bucket system (one for cleaning solution, one for rinsing) is best.
Q: How often should I deep clean to avoid buildup?
A: It depends on the area and usage. A good baseline is to perform the full 10-step protocol every 1-2 months. High-traffic zones like kitchens and bathrooms may need a mini-deep clean (appliances, grout, fixtures) every 2-4 weeks. Consistent daily and weekly tidying drastically reduces how often a deep clean is necessary.
Q: Are ‘green’ cleaners always safe for all surfaces?
A: No. “Green” or natural cleaners can still be acidic (like lemon juice or vinegar) or abrasive (like baking soda), which can damage sensitive surfaces like natural stone, unsealed wood, or certain metals. Always check the label and test any cleaner, green or not, in an inconspicuous spot first.