Here’s a common belief that quietly sabotages your cleaning efforts: a cleaning tool is just a cleaning tool—it doesn’t need care. You grab a cloth, wipe a surface, and consider the job done. But what if that simple act is actually making your home dirtier? The truth is, neglecting your cloths, brushes, and mops is one of the most significant cleaning tool mistakes to avoid. It leads to a frustrating cycle of wasted money on prematurely ruined supplies, surfaces that never seem truly clean, and the unintentional spread of germs from one room to another. This article isn’t about buying more stuff; it’s about revealing the small, correctable errors in how you use and care for the tools you already own. By fixing these cleaning supply maintenance mistakes, you can transform your routine from a chore into a genuinely effective—and even money-saving—practice.
The biggest cleaning tool mistakes to avoid are using a single cloth for everything, never washing your brushes, and storing damp tools. These errors spread dirt and germs instead of removing them, damage surfaces, and force you to replace supplies prematurely. To clean effectively, you must match the tool to the task, clean the tools themselves regularly, and ensure everything is stored clean and dry.
Myth: ‘One Cloth Cleans All’ – The Cross-Contamination Culprit
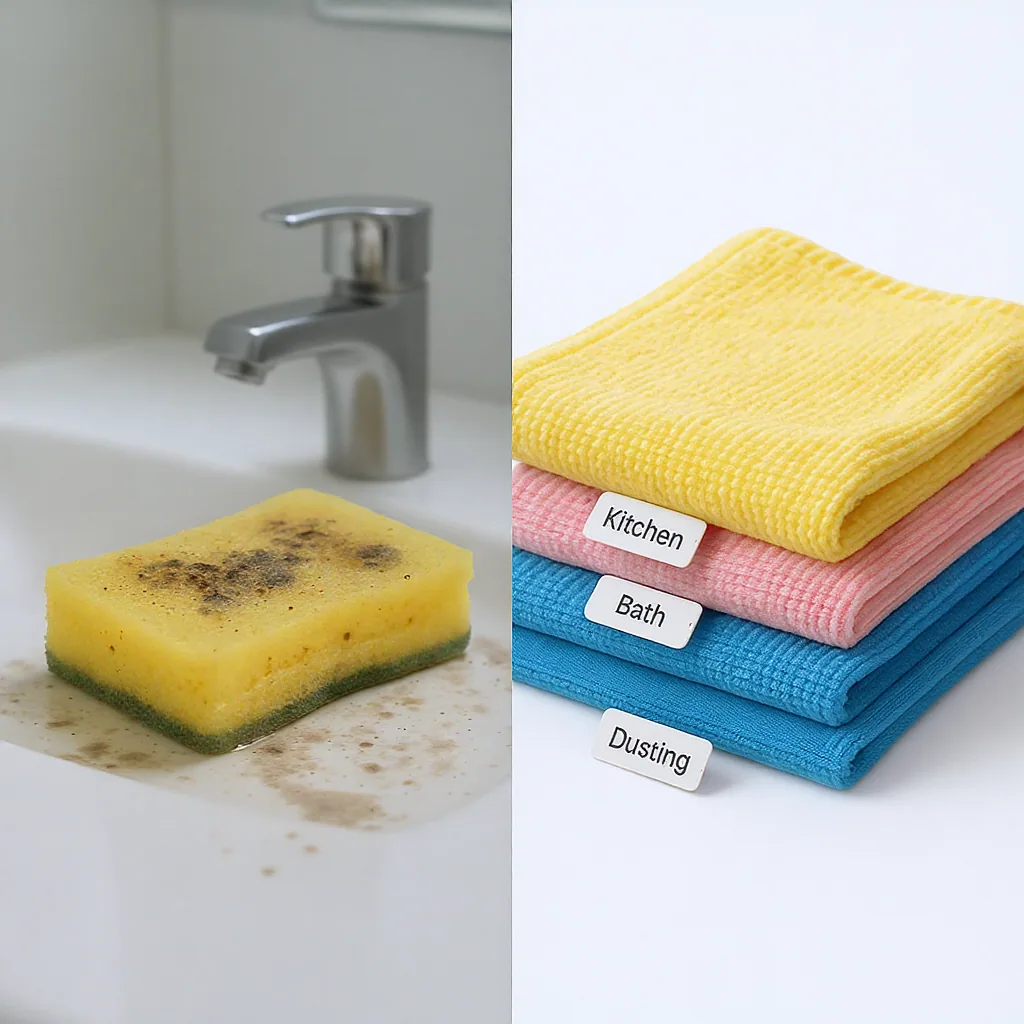
It’s tempting to grab the nearest rag, wipe down the kitchen counter, and then use the same cloth on the bathroom sink. This is one of the most pervasive cleaning cloth mistakes. The myth that one cloth can handle everything turns your tool into a vehicle for spreading germs and grime, not removing them. You’re essentially painting dirt from one surface onto another, a classic example of dirty cleaning tools undermining your efforts.
The Simple Fix: Zone Defense
The solution is simple: assign cloths to specific zones. Use one color for the kitchen (grease, food), another for bathrooms (germs, soap scum), and a third for general dusting and glass. This visual system prevents cross-contamination instantly.
Care Differs by Material
How you clean your cloths matters just as much. For microfiber, wash in hot water and avoid fabric softener or dryer sheets, which coat the fibers and ruin their electrostatic dirt-grabbing power. Cotton cloths can handle bleach or vinegar soaks for sanitizing. The key is to wash them after use—don’t let them fester in a damp pile. A study on household hygiene from the NSF International highlights how kitchen sponges and cloths can be among the most contaminated items in a home, reinforcing why proper cleaning supply maintenance is non-negotiable.
The Brush Blunder: Using Stiff Brushes on Delicate Surfaces
Brushes are for scrubbing, right? Not always. Using a stiff-bristled brush or a harsh scouring pad on a delicate surface is a fast track to permanent damage. Scrubbing a stainless-steel refrigerator door with a heavy-duty brush can leave fine scratches that trap dirt. Aggressively attacking a wooden deck or laminate floor with stiff bristles can strip finishes and gouge the material.
Here’s a typical scenario: After a messy dinner, you see baked-on grime on a non-stick pan. Frustrated, you grab a stiff brush or metal scrubber and go to town. Not only does this risk damaging the pan’s coating, but you’re also likely just embedding food particles deeper while wearing down the brush bristles prematurely. It’s a lose-lose situation that stems from a brush maintenance error in tool selection.
Match the Brush to the Task
Softer bristles (like nylon) are for non-stick, stainless steel, and finished wood. Medium stiffness works for tiles and tubs. Reserve stiff, abrasive brushes for concrete, grout, or outdoor furniture. Also, don’t forget to clean the brush itself. Rinse out all debris after use, and occasionally soak it in a disinfecting solution. Stand it upright to dry completely; storing it wet on its bristles is a sure way to breed mildew and weaken the base.
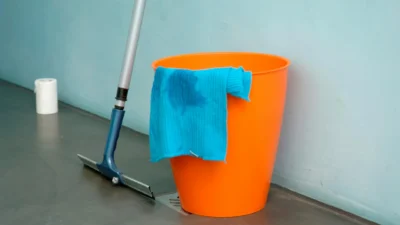
The Silent Killer of Your Mop and Vacuum
Your floor cleaning tools work hard, but neglecting their basic care renders them useless—or worse, counterproductive. This is where cleaning supply maintenance mistakes hit your wallet and your floors the hardest. A dirty mop just pushes dirty water around. A vacuum with a clogged filter loses suction, and a roller brush tangled with hair and string can’t pick up a thing.

Photo by Vitaly Gariev on Unsplash
Dos and Don’ts for Floor Tool Longevity
DO: Wash mop heads after every use (or use disposable pads). Clean vacuum filters monthly (check your manual—some are washable, some are not). Cut hair and string from the roller brush regularly. Empty the vacuum canister or bag before it’s completely full. Let mop heads and pads dry completely before storage.
DON’T: Use the same bucket of mop water for your entire house. Leave a wet mop head crumpled in a bucket or closet. Ignore strange noises or loss of suction from your vacuum. Use a wet mop on hardwood floors without wringing it nearly dry first. These habits are the core common cleaning tool errors that shorten the life of your most expensive cleaning gear.
Following these basic proper tool cleaning steps is the single best way to extend cleaning tool life and ensure your floors actually get clean.
Supply Care Sins: Where You Store Matters as Much as How You Clean
You’ve used the right cloth, chosen the correct brush, and cleaned your mop. But if you then toss everything into a dark, damp cabinet under the sink, you’re inviting a whole new set of problems. Dark, cramped, and humid storage is a paradise for mold, mildew, and bacteria. Your tools become dirty cleaning tools before you even use them again, making your next cleaning session start from a point of contamination. This is a fundamental supply care blunder.
Think about a damp mop head shoved into a utility closet. By the next week, it has a musty odor that will spread across your floors. A microfiber cloth left bunched up in a bucket stays damp for days, growing microbes.
3 Quick Storage Fixes
- Air is Your Ally: Hang mop heads and cloths to dry completely before putting them away. Use an over-the-door hook or a simple rack.
- Bristles Up: Store brushes and brooms upright, with the bristles pointing upward to help them keep their shape and dry out.
- Declutter the Arsenal: Keep your storage area ventilated. Don’t cram tools together. A simple over-the-door organizer or a caddy can keep things separated and accessible.
Your Action Plan: Correcting These Mistakes Starting Today
Knowing the mistakes is one thing; fixing them is another. Let’s shift from problem-identification to solution-mode with a straightforward action plan. You don’t need to overhaul everything at once. Start here.
1. The Weekend Audit
Take 15 minutes to gather your core cleaning tools. Toss any cloths or sponges that are permanently stained or smell musty. Check brushes for splayed or damaged bristles. Look at your mop head and vacuum filter. This audit shows you what you’re working with and what needs immediate replacement.
2. Implement One New Habit
Choose the easiest fix first. Maybe it’s designating a specific cloth for the bathroom and committing to washing it weekly. Perhaps it’s setting a phone reminder to check your vacuum filter on the first of the month. Small, sustainable changes stick better than a complete system overhaul.
3. Establish a “Clean the Cleaners” Routine
Build tool maintenance into your existing cleaning routine. When you finish mopping, washing the mop head is part of the job. After vacuuming, a quick check of the brush roll is part of putting it away. This mindset shift—from seeing tools as disposable to seeing them as assets that need care—is how you avoid ruining cleaning tools and save money long-term.
Smarter Habits, Not Harder Work
Avoiding these common cleaning tool mistakes isn’t about achieving perfection or spending hours on maintenance. It’s about being slightly more mindful of the small habits that have an outsized impact. When you use the right tool for the surface, clean your supplies regularly, and store them properly, you’re not just cleaning—you’re cleaning effectively. The process becomes faster, your results are visibly better, and you’ll replace supplies far less often. Ultimately, it puts you in control of your cleaning routine, turning a chore into a more efficient, even satisfying, practice.
The core principles for avoiding cleaning tool mistakes are simple but powerful. Segregate your cloths by zone (kitchen, bath, dusting) to prevent cross-contamination. Always match your brush’s stiffness to the surface you’re cleaning to avoid damage. Maintain your floor tools by washing mop heads and cleaning vacuum filters regularly. Finally, store everything clean and completely dry to prevent mold and mildew. Adopting these four habits forms the foundation of a smarter, more effective cleaning routine that saves time and money.
Q: Can I just throw my microfiber cloths in with my regular laundry?
A: You can wash them together, but with caveats. Use hot water and avoid fabric softener, which clogs microfiber fibers. Wash with similar colors and avoid items that produce heavy lint (like towels). Tumble dry on low or no heat; high heat can damage the fibers.
Q: How often should I really replace my toilet brush?
A: There’s no universal expiry date, but replace it if the bristles are frayed, stained, or if a musty smell persists after cleaning. For hygiene, many experts suggest replacing it every 6-12 months. Consider a brush with a replaceable head for less waste.
Q: Is it bad to use the same mop water for my whole house?
A: Yes. As you mop, the water becomes increasingly dirty. Using it room-to-room means you’re spreading the dirt and germs from the dirtiest area (often the kitchen or entryway) across your entire floor. Change the water after cleaning a heavily soiled area or every 2-3 rooms.
Q: What’s the best way to dry a mop head to prevent smell?
A: After rinsing thoroughly, wring it out as much as possible. Then, hang it in a well-ventilated area, ideally in sunlight, with the strands separated. Never leave it crumpled in a bucket or a dark closet, as trapped moisture causes mildew and odors.
For a practical walkthrough, see Cleaning Mistakes to Avoid.