You wipe down your sink faucet, step back to admire the shine, and within hours, those familiar cloudy spots and streaks are already creeping back. It’s a uniquely frustrating cycle, and it usually points to one core mistake: treating all faucet buildup as if it’s the same enemy. The truth is, that filmy haze from this morning’s splash is a completely different beast from the chalky, crusty rings that have been building for months. Effective sink faucet buildup cleaning isn’t about finding one magic cleaner; it’s about first diagnosing whether you’re dealing with fresh water spots or set-in mineral deposits. Using the harsh, abrasive method on a fresh film is overkill and risks scratching your finish, while using a gentle wipe on hardened limescale is just an exercise in futility. This guide cuts through the frustration by showing you how to spot the difference and apply the right, simple protocol for each.
The best way to clean sink faucet buildup is to first identify if the spots are fresh (soft, recent) or set-in (hard, old). For fresh spots, a simple vinegar solution and microfiber cloth often works. For set-in mineral deposits, you’ll need a stronger acid like CLR or a paste of baking soda and vinegar, applied with patience and a soft brush to avoid scratching the finish.
Why Your Faucet Gets Spots in the First Place
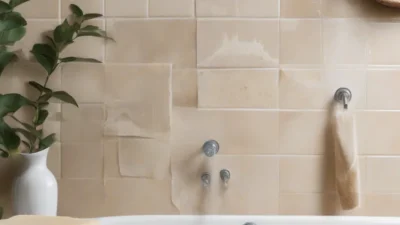
That frustrating film or crust on your faucet isn’t just dirt—it’s chemistry. The primary culprit is hard water, which contains high levels of dissolved minerals like calcium and magnesium. When water evaporates on your faucet’s surface, these minerals are left behind as deposits. Over time, these mineral deposits bond with soap residue, oils from your skin, and even tiny bits of toothpaste to form the visible buildup you see.
The speed and severity of this problem depend on two main factors. First, your water’s hardness level—if you live in an area with very hard water, you’ll see spots form much faster. Second, your faucet’s finish plays a role. Highly polished chrome, for example, tends to show every single water spot, while brushed nickel or oil-rubbed bronze can be more forgiving, though they are not immune to hard water stains on faucet. Understanding this root cause is the first step in choosing an effective cleanup strategy.
Photo by Konstantinos Papadopoulos on Unsplash
Fresh Spots vs. Set-In Buildup: Spot the Difference
Treating all faucet gunk the same way is the most common hard water spot mistake. Effective bathroom faucet spots cleaning (and kitchen faucet cleaning) starts with a quick diagnosis. Here’s how to tell what you’re dealing with.
Fresh Water Spots: These are recent, often from the last use or day. They feel soft and filmy to the touch, and you can usually smear them with a damp finger. They appear as hazy streaks or droplets and haven’t had time to chemically bond strongly to the metal. A simple wipe-down with the right cleaner should remove them without a fight.
Set-In Mineral Buildup (Limescale): This is the hardened, crusty enemy. It’s been building up for weeks or months, forming a chalky, white, or sometimes discolored crust. It feels rough and hard, and a damp finger won’t budge it. This faucet mineral deposits has solidified and requires a more aggressive approach to break its bond with the finish.
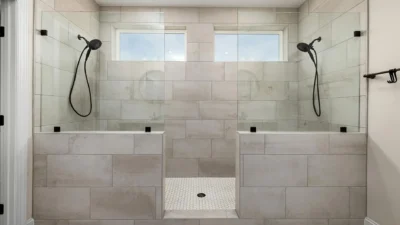
Photo by David Trinks on Unsplash
The Gentle Protocol for Fresh Water Spots
For fresh, filmy deposits, your goal is gentle dissolution, not aggressive scrubbing. This protocol is quick, safe for all finishes, and prevents you from causing scratches that will only trap more grime later.
What You’ll Need:
- White distilled vinegar
- Water
- Soft cloth or paper towels
- Microfiber cloth (for drying)
The Steps:
- Mix Your Solution: Combine equal parts white vinegar and warm water in a small bowl or spray bottle.
- Apply and Dwell: Soak a cloth in the solution and wrap it around the spotted areas of the faucet. For the spout, you can drape the cloth over it. Let it sit for 5-10 minutes. The mild acid in the vinegar will soften and dissolve the fresh mineral film.
- Wipe Clean: Use the damp cloth to wipe all surfaces. The spots should come off easily. No need to scrub hard.
- The Crucial Final Step: Immediately dry the entire faucet thoroughly with a clean, dry microfiber cloth. This prevents new water from evaporating and leaving spots on your freshly cleaned surface, which is a key part of effective cleaning faucet limescale before it even becomes limescale.
The Power Clean for Stubborn, Set-In Deposits
When you’re facing crusty, white limescale, the gentle vinegar soak might not be enough. This protocol uses stronger agents and a bit more patience to break down hardened deposits without damaging your fixtures.
Option 1: Commercial Lime Remover
Products like CLR (Calcium, Lime, Rust Remover) are formulated for this exact job. Always read and follow the label instructions. Typically, you apply the product, let it foam and dwell for the specified time (often 1-2 minutes), then rinse extremely thoroughly with water. Work in a well-ventilated area and wear gloves. It’s wise to test it on a small, hidden area of your faucet first.
Option 2: The Baking Soda Paste Scrub
For a potent yet non-toxic alternative, make a thick paste of baking soda and a small amount of water or vinegar. Apply this paste directly to the crusty areas and let it sit for 15-20 minutes. The paste will cling to vertical surfaces. Then, using a soft-bristled toothbrush (never a metal brush or abrasive pad), gently scrub the area. The baking soda provides mild abrasion to help dislodge the crust while being far safer for finishes. Rinse completely and dry.
A critical warning for both methods: Never use abrasive scouring pads, steel wool, or harsh powders. They will microscratch chrome and other finishes, creating a rough surface that attracts future buildup even faster, making your removing water spots from chrome a permanent battle.
Common Hard Water Spot Mistakes to Avoid
Knowing what not to do is just as important as knowing the right method. Steer clear of these errors to keep your faucets looking new.
- Using Abrasive Tools: Steel wool, green scouring pads, and harsh powders are the arch-nemesis of a shiny faucet finish. They create tiny scratches that become magnets for future mineral deposits and soap scum.
- Reaching for Bleach or Ammonia: These harsh chemicals are unnecessary for mineral deposits and can damage certain faucet finishes, especially older or coated ones. They also don’t effectively dissolve the calcium and magnesium that cause the spots.
- Incomplete Rinsing: After using any acidic cleaner (vinegar or commercial remover), failing to rinse the surface thoroughly with clean water can leave a residue that might interact with the finish or feel sticky.
- The One-Method-Fits-All Approach: The core mistake is using the same tactic on a fresh film as you would on a years-old crust. Diagnose first, then apply the appropriate protocol for effective how to clean sink fixtures.
Keep Your Faucet Sparkling for Good
The battle against faucet spots is winnable once you stop treating all buildup as the same enemy. By taking a moment to identify whether you’re dealing with fresh film or set-in scale, you can apply the right tool for the job—saving yourself time, effort, and potential damage to your fixtures. The real secret to a perpetually clean faucet isn’t a magical cleaner; it’s consistency. A quick wipe-down with the gentle protocol after cleaning your sink can prevent fresh spots from ever hardening into a stubborn crust. With this simple diagnose-and-treat approach, you can keep that chrome shining and make bathroom faucet spots cleaning a quick, manageable task instead of a dreaded chore.