You’ve just finished scrubbing your shower tiles. The steam clears, and instead of a sparkling finish, you’re met with a streaky haze or a dull film that makes the surface look worse than before. It’s a frustratingly common moment that feels like a cleaning failure, but it’s not. That haze is a clue—a diagnostic puzzle waiting to be solved. The culprit is usually one of three things: leftover product, hard water minerals, or simply a rinsing technique that needs a tweak. This article is your quick-reference bathroom tile cleaning checklist, designed to help you move from guesswork to a crystal-clear finish by identifying your specific problem and giving you the exact steps to fix it.
Streaks and film on bathroom tiles are typically caused by leftover cleaning product, hard water minerals, or insufficient rinsing. A quick diagnosis involves checking if the residue is sticky, powdery, or just hazy to choose the right removal method. Your fix starts with identifying which one you’re dealing with, then following a targeted checklist to resolve it without guesswork.
The Streak & Film Diagnostic: What Are You Actually Seeing?
Before you grab another bottle of cleaner, take a moment to diagnose. The fix for your streaky bathroom tile depends entirely on what’s causing the haze. Here’s a quick, two-step inspection to figure it out. your streaky bathroom tile depends

Step 1: The Touch Test
Run your fingers over the filmy area. What does it feel like?
- Sticky or Slightly Greasy: This is a classic sign of tile cleaner residue. You’re likely seeing leftover soap, detergent, or cleaning solution that wasn’t fully rinsed away. It attracts dust and makes surfaces look perpetually dull.
- Rough, Gritty, or Powdery: This points to hard water deposits. When mineral-rich water (calcium, magnesium) evaporates on the tile, it leaves behind a chalky, white scale. This is common around faucets and on shower walls.
- Smooth but Hazy: If the tile feels clean to the touch but just looks cloudy, the issue is almost certainly insufficient rinsing. A thin, uniform film of dirty water and dissolved grime has dried on the surface.
Step 2: The Water Test
Spray a small section of the tile with plain water from a spray bottle.
- If the water beads up and sits on top of the haze, you’re dealing with a water-repelling layer—again, pointing to product residue or wax buildup.
- If the water sheets evenly and the haze disappears temporarily, the problem is a water-soluble film from poor rinsing. The minerals from hard water may also partially dissolve.
This quick diagnosis isn’t a substitute for professional assessment in extreme cases, but it reliably points homeowners toward the right solution 99% of the time.
Your Targeted Cleaning Checklist (By Cause)
Now that you’ve identified the culprit, use this targeted clean bathroom tile checklist. Each cause gets its own action plan.
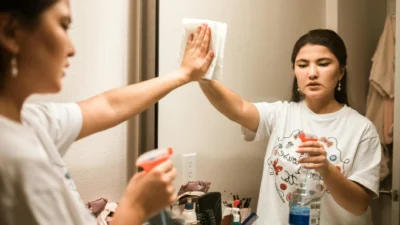
Photo by Ricardo Loaiza on Unsplash
Checklist A: For Product Residue & Sticky Film
Your goal is to cut through and completely remove the leftover cleaner.
- Strip the residue. Mix a solution of 1 part white vinegar to 4 parts warm water in a spray bottle. For tougher, waxy residues, a few drops of dish soap in warm water can work.
- Apply and dwell. Spray the solution generously onto the tile and let it sit for 3-5 minutes to break down the film.
- Scrub gently. Use a non-abrasive microfiber cloth or a soft-bristled brush to agitate the surface. Avoid harsh scrub pads that can scratch glossy tile.
- Rinse exhaustively. This is the critical step. Rinse the entire area with clean, cool water from top to bottom. Use a handheld showerhead or a bucket and sponge.
- Dry with a clean cloth. Buff dry with a lint-free microfiber towel to prevent new water spots.
Checklist B: For Hard Water Deposits & Chalky Streaks
You need a mild acid to dissolve the mineral scale.
- Choose your acid. White vinegar or citric acid powder dissolved in water are effective, eco-friendly options. For heavy buildup, a commercial lime scale remover may be needed.
- Apply safely. Spray or apply the solution directly to the deposits. Important: Never use vinegar or acidic cleaners on natural stone tiles (like marble or travertine), as it will etch them.
- Let it work. Allow the acid to fizz and react with the minerals for 5-10 minutes. Do not let it dry on the surface.
- Scrub and rinse. Gently scrub the area, then rinse thoroughly with water. You should see the powdery residue wash away.
- Prevent recurrence. Consider installing a water softener showerhead to minimize future deposits.
Checklist C: For Hazy Tiles from Poor Rinsing
This is all about perfecting your technique.
- Start with a cleaner that rinses easily. Avoid thick, sudsy formulas. A simple all-purpose cleaner or the vinegar solution mentioned above often works best.
- Clean in sections. Don’t clean the entire shower at once. Work on a 3×3 foot area so you can rinse before the cleaner dries.
- Rinse from the top down. Always start rinsing at the highest point of the tile you cleaned. This prevents dirty, soapy water from streaking down over already-rinsed areas.
- Use ample water. A quick splash isn’t enough. Flood the area with clean water, ensuring all cleaner is carried off the surface.
- Squeegee or dry immediately. After the final rinse, use a squeegee or dry microfiber cloth to remove standing water. This is the single best habit for prevent[ing] tile cleaner film and water spots.
Common Mistakes That Leave a Film (And How to Avoid Them)
Often, the haze isn’t from the wrong product, but from a small error in process. Here are the frequent missteps that sabotage a streak-free finish.
Mistake: Using too much cleaning product. More is not better; it just creates more residue to rinse away.
Correction: Follow the dilution instructions. A little goes a long way.
Mistake: Using a dirty cloth, mop, or sponge. You’re just spreading old grime and residue around.
Correction: Use clean microfiber cloths for washing and rinsing, and wash them frequently.
Mistake: Not rinsing thoroughly, or rinsing out of order. Rinsing bottom-to-top guarantees streaks.
Correction: Adopt the top-down rinsing method from Checklist C, and use plenty of water.
Mistake: Using the wrong cleaner for your water type. A soap-based cleaner in hard water creates “soap scum” (a combo of soap and minerals) almost instantly.
Correction: In hard water areas, opt for detergent-based or acidic cleaners that don’t react with minerals.
Mistake: Drying (or air-drying) with a linty towel. Lint particles stick to a damp surface, creating a new kind of film.
Correction: Use a dedicated, lint-free microfiber drying towel for your glass and tile.
Keeping Tiles Crystal Clear: The Maintenance Mindset
Shifting from heavy scrubbing to light, consistent care is the secret to forever avoiding the tile cleaning diagnostic steps. It’s about habits, not heroics.
The most powerful tool isn’t a special cleaner—it’s a squeegee. Taking 30 seconds after each shower to squeegee the walls and door removes water before it can evaporate and leave minerals or film behind. This one habit reduces cleaning frequency by at least half.
Pair this with a weekly “refresh”: a quick spray-down with a diluted bathroom cleaner or vinegar solution, followed by a rinse and squeegee. This prevents soap scum and hard water deposits from ever building up to a point where they cause streaky shower tiles. By cleaning little and often, you’ll always have a bathroom that looks freshly cleaned, without the struggle.
Your decisive next step? Go back to the diagnostic section, confirm your cause, and run through the corresponding checklist. You’ll see a noticeable difference immediately.
From Frustration to a Flawless Finish
Streaks and film on your bathroom tiles are a solvable puzzle, not a permanent flaw. By taking a moment to diagnose—sticky, powdery, or just hazy—you move from guessing to knowing. The targeted checklists give you a clear, step-by-step path to strip away residue, dissolve minerals, or master the rinse technique.
Remember, the goal isn’t just to fix today’s haze, but to prevent tomorrow’s. Adopting simple maintenance habits like post-shower squeegeeing transforms cleaning from a chore into a quick refresh. Start with the diagnosis, follow your checklist, and enjoy the satisfaction of truly crystal-clear tiles.